
How It Differs from Traditional Routers or Extenders
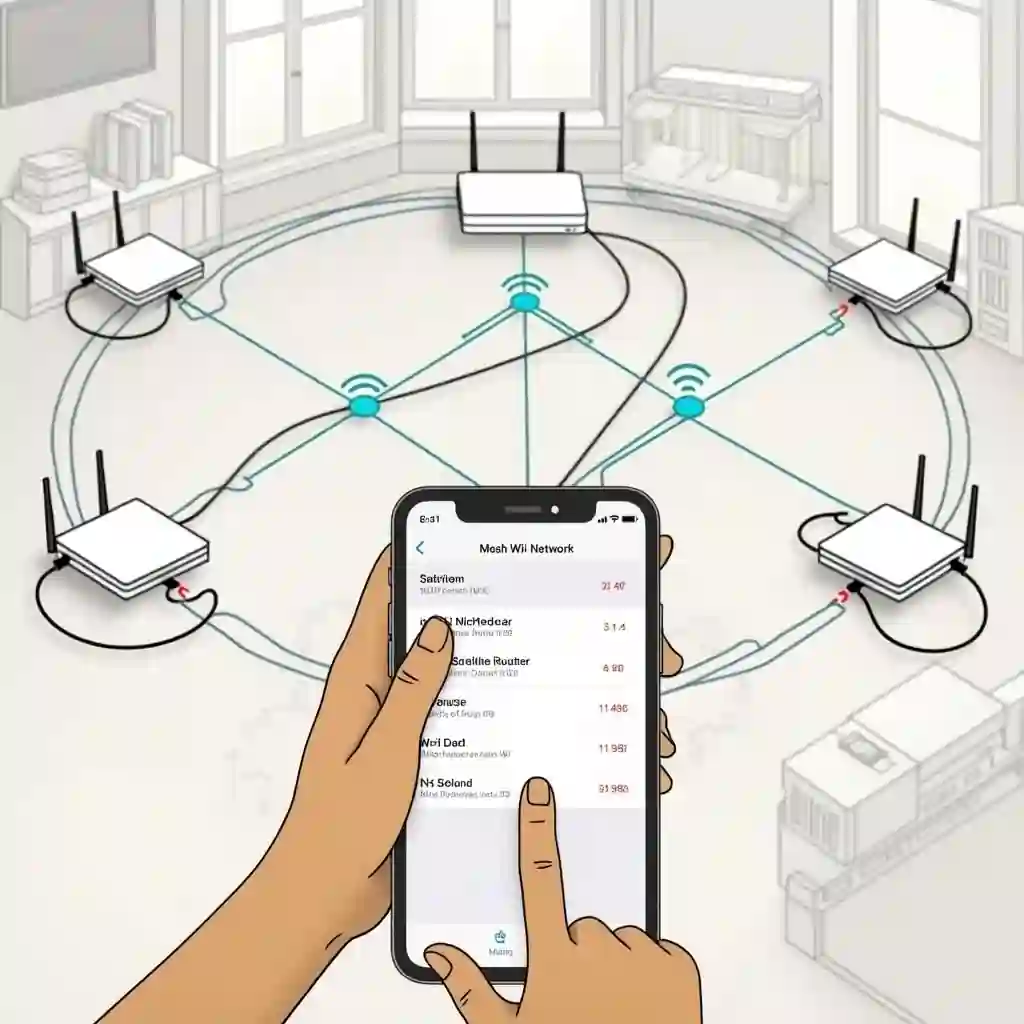
A mesh WiFi system consists of a main router (primary node) connected to your modem, plus one or more satellite nodes spread across the house. All nodes communicate with each other — either wirelessly or through Ethernet — to create a single, unified network (single SSID).
Unlike traditional routers (which broadcast from one point — often not enough for large or multi‑storey homes) or simple WiFi extenders (which often create separate networks and suffer from speed loss), mesh systems offer:
- consistent coverage across many rooms or floors, even through obstacles like thick walls,
- seamless roaming (your phone/laptop automatically connects to the nearest node as you move),
- scalability: you can expand the network by adding more nodes later
- easier management — often through a smartphone app, with settings like guest network, parental control, device prioritization etc.
Because of these advantages, mesh WiFi is a better fit for larger houses, homes with many devices, or for people who want seamless, strong internet everywhere.
What You’ll Need Before Starting (Modem, Mesh Kit, App, Ethernet Cable)
Before beginning, make sure you have:
- A working internet connection and modem (from your ISP). If your ISP modem includes a router with WiFi, it’s best to disable its WiFi radios or put it in bridge mode to avoid interference.
- A mesh WiFi kit (main router + 1 or more satellite nodes) — pick based on your home size / coverage needs.
- An Ethernet cable (Cat5e or above) to connect the main node to the modem — sometimes optional, but recommended for stability especially if you plan wired backhaul or heavy traffic.
- A smartphone or tablet to install the mesh‑system app provided by manufacturer (for setup, management, firmware updates)
With these ready, you can move ahead to the actual setup.
Configuring Your Mesh Network: SSID, Security, Settings
Once all nodes are physically connected/powered:
- Use the app to set or confirm your network name (SSID) and password. Use a strong password and modern encryption (WPA2 or WPA3 if available).
- Optionally configure guest network, parental controls, device prioritization (QoS), and other features depending on your needs and the capabilities of your mesh system.
- If your mesh system or modem/router combo supports it — disable the old router’s WiFi or use “bridge mode” to avoid having two overlapping networks.
With configuration done, your home should now run a unified WiFi network across all nodes.
Coverage, Speed & Signal Quality
After setup, go around your home with a smartphone or laptop and check:
- Signal strength (WiFi bars) in areas that were previously dead‑zones
- Internet speed (using tools like speed test) — check both near main router and near farthest nodes
- Device switching — walk between rooms to confirm seamless handoff between nodes (no drops or reconnection required)
If you find weak spots or slow speeds:
- Try repositioning nodes slightly (move them closer together or relocate to more open spots)
- Ensure firmware of all nodes is up to date — firmware updates often fix bugs and improve stability
Common Mistakes and How to Avoid Them
Many people try mesh WiFi but run into issues — often due to mistakes like:
- Putting nodes in weak‑signal zones (hoping to extend to dead zones) — that doesn’t work; the node itself needs good signal. Always place halfway between router and dead zone.
- Forgetting to disable the old ISP router WiFi — leads to interference, double networks, devices jumping unpredictably between networks.
- Relying on wireless backhaul for many nodes far apart — if your house is large or has thick walls, throughput may suffer; wired backhaul (if possible) is more stable.
- Buying a mesh kit that’s undersized for the home — many marketing claims of coverage are optimistic; better to have more nodes than minimum for reliability.
Tips to Optimize Performance (Backhaul, Placement, Firmware, Device Prioritization)
- If possible, use wired backhaul (Ethernet) to link nodes — this typically offers more stable speed and lower latency than wireless hops.
- Keep mesh units elevated, out in the open and avoid placing near interference sources (kitchen appliances, thick walls, metal furniture).
- Regularly update firmware for performance improvements, bug fixes, and security updates.
- Use app-based settings: enable band steering, guest network, QoS / device prioritization, parental controls, depending on your household’s needs.
- If you have many devices (smartphones, laptops, TVs, IoT devices, smart home gadgets), ensure your mesh system supports simultaneous connections and consider a higher-end kit for future-proofing.
When Mesh Might Not Be the Best Option — and What to Do Instead
Mesh WiFi is powerful — but it’s not always necessary. Consider alternatives if:
- You live in a small apartment or small single‑room house — a good standalone router may suffice and be more cost-effective.
- Most devices are near the router (no big distance or multiple floors)
- You need many wired connections (mesh nodes have few Ethernet ports) — for many wired devices, a proper wired network + access points might serve better than mesh.
In such cases, a high‑quality router (or router + access points), or a wired network might be simpler and cheaper.
Checklist For Set Up Mesh WiFI
Here’s a quick checklist before you start your mesh WiFi setup:
✅ Confirm your internet plan and modem are working
✅ Choose a mesh WiFi kit suitable for your home size
✅ Disconnect old router/modem WiFi or enable bridge mode
✅ Connect modem → main mesh router → power on
✅ Install mesh app, set SSID & password
✅ Place satellites/nodes optimally (halfway to dead zones, elevated, clear)
✅ Add nodes via app, finalize setup
✅ Test coverage, walk around home, do speed tests
✅ Update firmware, configure network settings (guest, parental, QoS)
✅ Monitor performance & adjust node placement if needed
Let’s Dive into details on this checklist
Confirm your internet plan and modem are working
Before setting up a mesh system, make sure your internet service is active and the modem provided by your ISP is working correctly.
- Check that your modem shows proper connectivity (usually via lights labeled “Internet” or “WAN”).
- Run a simple speed test with your current setup to know your baseline speeds.
- Ensure your ISP supports multiple devices connected via mesh if you plan to have several nodes.
- Why it matters: If your internet or modem has issues, your mesh WiFi setup will be slow or unstable regardless of configuration.
Choose a mesh WiFi kit suitable for your home size
Not all mesh kits are created equal. Consider:
- Home size: A 2-bedroom apartment may need just 2 nodes, while a large multi-story house may need 3–5 nodes.
- Number of devices: More devices (smartphones, smart TVs, gaming consoles, IoT gadgets) may require a higher-end kit with better capacity.
- WiFi standard: Look for WiFi 6 for faster speeds and better handling of multiple devices.
- Budget: Higher-end kits provide better performance and extra features like parental controls or advanced security.
- Why it matters: Choosing the wrong kit can lead to dead zones or wasted money.
Disconnect old router/modem WiFi or enable bridge mode
If your ISP modem has WiFi, it can interfere with your new mesh network.
- Disable WiFi: Turn off the WiFi on your old router/modem.
- Bridge mode: If your modem-router combo can’t turn off WiFi, enable bridge mode so it acts only as a modem.
- Why it matters: Prevents network conflicts and ensures all devices connect to the mesh network seamlessly.
Connect modem → main mesh router → power on
This is the physical setup of your mesh network:
- Connect an Ethernet cable from your modem’s LAN port to the WAN port of the main mesh router.
- Power on your modem first, wait until it’s online, then power the main mesh node.
- Why it matters: This ensures your primary mesh node gets a stable internet feed and can distribute it efficiently to all nodes.
Install mesh app, set SSID & password
Most modern mesh systems use a mobile app for setup. Steps usually include:
- Download the manufacturer’s app (TP-Link Deco, Google Home, Netgear Nighthawk, etc.).
- Follow step-by-step instructions to detect the main node.
- Set your network name (SSID) and a strong password.
- Optionally, configure advanced features like guest networks.
- Why it matters: The app simplifies configuration and management, and strong passwords protect your network from unauthorized access.
Place satellites/nodes optimally (halfway to dead zones, elevated, clear)
Correct placement of satellite nodes ensures consistent coverage:
- Place each node halfway between the main router and the area where signal is weak.
- Elevate nodes — avoid placing them on the floor or inside cabinets.
- Keep nodes away from interference sources like microwaves, thick walls, or metal furniture.
- Why it matters: Proper placement maximizes coverage, improves speed, and avoids dead zones.
Add nodes via app, finalize setup
After placing nodes:
- Use the mesh app to add each satellite node to your network.
- Most systems automatically detect the main router and configure the connection.
- Make sure each node shows “online” in the app.
- Why it matters: Finalizing setup ensures the network is fully integrated and all nodes are communicating correctly.
Test coverage, walk around home, do speed tests
Check how your network performs in real-life usage:
- Walk around your house with a phone or laptop.
- Verify signal strength and speed in previously weak areas.
- Use speed-test tools to compare performance near different nodes.
- Why it matters: This step identifies any weak spots so you can adjust node placement before finalizing setup.
Update firmware, configure network settings (guest, parental, QoS)
- Check for firmware updates for your mesh system and install them.
- Configure optional settings:
- Guest network for visitors
- Parental controls for kids’ devices
- QoS (Quality of Service) to prioritize devices or applications like gaming or streaming
- Why it matters: Keeps your network secure, optimized, and customized for your household needs.
Monitor performance & adjust node placement if needed
Even after setup:
- Observe your network performance over a few days.
- Move nodes slightly if certain areas still have weak signals.
- Keep firmware updated and check the app for any alerts.
- Why it matters: Ensures your mesh network continues to deliver fast, reliable WiFi throughout your home.