

Connect HDMI cable, select the HDMI input, then configure display settings on your computer.
I have set up dozens of dual-monitor workstations and troubleshooting HDMI links for home offices and design studios. This guide on how to set up second monitor with HDMI walks you through hardware checks, step-by-step setup, common fixes, and tips for a fast, reliable dual-screen workspace. Read on to get a smooth, professional second-monitor setup that saves time and reduces frustration.
Why add a second monitor with HDMI?
A second display boosts productivity, makes multitasking easier, and improves comfort when working. Using HDMI for your second monitor gives you a single cable that carries both video and audio, making the setup clean and simple. If you want more screen space for apps, video, or editing, learning how to set up second monitor with HDMI is one of the quickest upgrades you can do.

What you need before you start
Plan ahead to keep the setup quick and painless. Check these items before you begin setting up your second display with HDMI.
- A computer or laptop with an HDMI port or an adapter for HDMI.
- A monitor with an HDMI input and an HDMI cable of appropriate length.
- Up-to-date graphics drivers on your computer.
- Power cords, a stable desk or monitor arm, and optionally a USB hub for extra ports.
Confirm that your computer supports dual monitors. Many modern laptops and desktops do, but some older or budget models can only drive one display natively. If you are unsure how to set up second monitor with HDMI on your specific model, check the manual or system specs first.
Step-by-step: How to set up second monitor with HDMI
Follow these clear steps to connect and configure your second screen over HDMI.
- Prepare both devices
- Turn off the monitor and computer before plugging in cables to avoid hot-plug issues. Unplug power if you prefer extra caution.
- Connect the HDMI cable
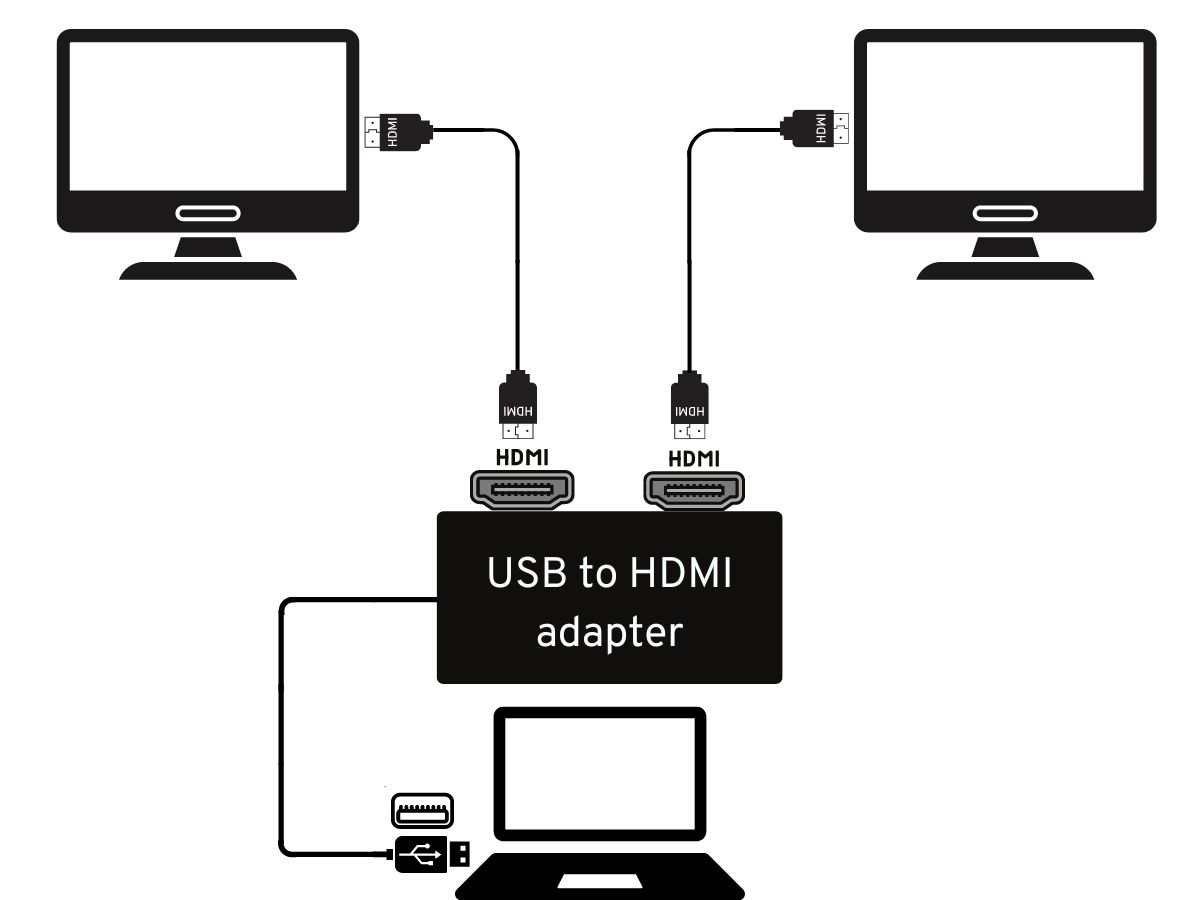
- Plug one end of the HDMI cable into the computer’s HDMI port and the other end into the monitor’s HDMI input. If your laptop uses USB-C or DisplayPort, use a compatible adapter to HDMI.
- Power on and select input
- Turn on the monitor first, then the computer. Use the monitor’s input/source button to pick HDMI if it doesn’t switch automatically.
- Detect the display in your OS
- On Windows: Right-click the desktop and choose Display settings. Click Detect or Rearrange displays and choose Extend or Duplicate.
- On macOS: Open System Settings, select Displays, then click Arrangement and enable Mirror or Extend.
- These steps show how to set up second monitor with HDMI in the OS controls.
- Set resolution and scaling
- Match the monitor’s native resolution for best clarity. Adjust scaling if text looks too small or large. Use the recommended resolution shown in display settings.
- Choose layout and primary monitor
- Drag screens to match physical placement (left/right or above/below). Set your main display where taskbar or dock should appear.
- Configure audio output (optional)
- HDMI can carry audio. If you want sound from the monitor, change the audio output to the HDMI device in sound settings.
- Calibrate color and brightness
- Adjust brightness, contrast, and color profile for consistent visuals between screens.
- Cable management and ergonomics
- Route cables behind the desk. Position monitors at eye level and at a comfortable viewing distance to reduce neck strain.
- Test with apps and video
- Move windows between screens, play video, and run intensive apps to confirm stable performance. If you face issues, refer to the troubleshooting section below.
I once connected a new ultrawide as a second display for a designer. The HDMI cable was fine, but the laptop defaulted to low resolution. Updating the graphics driver and setting the monitor to its native resolution fixed the clarity immediately. Small driver updates often resolve display oddities when you learn how to set up second monitor with HDMI.
Troubleshooting common HDMI second monitor issues
Here are fast fixes for problems you may hit during setup.
- No signal on monitor
- Check both ends of the HDMI cable and the monitor input. Try a different HDMI cable or port.
- Display detected but black screen
- Confirm correct input and try toggling power. Update graphics drivers and test with another device.
- Wrong resolution or blurry text
- Set the monitor to its native resolution. Adjust scaling in OS display settings.
- Flickering or intermittent drops
- Use a high-quality HDMI cable rated for the resolution and refresh rate. Lower refresh rate if the GPU struggles.
- No audio through HDMI
- Set HDMI as the default audio device in sound settings. Reboot if the audio device does not appear.
- Adapter compatibility issues
- If using USB-C or DisplayPort to HDMI adapters, choose active adapters for older monitors and higher resolutions.
When troubleshooting, isolate variables: swap cables, try a different monitor, and test another HDMI port. This method helps you find whether the issue is the cable, monitor, or computer.
Tips for optimal setup and ergonomics
Small setup choices make a big difference to comfort and workflow.
- Use a monitor arm or riser to set the top of the screen at eye level.
- Keep the primary work monitor centered and the second monitor to the side you use most.
- Match color profiles between screens for accurate design and photo work.
- Use short keyboard shortcuts to move windows between displays quickly.
- If you work with high-resolution media, choose HDMI 2.0 or higher for 4K at 60Hz.
From experience, placing your secondary monitor slightly angled toward you reduces head turns and wrist strain. Learning how to set up second monitor with HDMI properly improves your posture and focus.
:max_bytes(150000):strip_icc()/Common_Display_Interfaces-8d80eb6456cf45dcbcde3e7368bda013.jpg)
Advanced settings and multi-monitor modes
Once basic setup is stable, refine how your displays work together.
Extend vs Duplicate
- Extend expands your desktop across both screens. This is ideal for multitasking.
- Duplicate mirrors the same image on both screens. Use this for presentations.
Set primary display and taskbar placement
- On Windows, select the primary display in Display settings to move the taskbar and desktop icons.
- On macOS, drag the white menu bar in the Arrangement panel to choose the primary screen.
GPU control panels
- Use your GPU’s control panel to fine-tune color, resolution, and refresh rate. Nvidia Control Panel, AMD Radeon Settings, or Intel Graphics Command Center provide extra options.
Calibrate and test performance
- Run a calibration tool or built-in display settings for consistent color. Test with videos and games to confirm refresh rate and latency.
These advanced tweaks help you get the most from how to set up second monitor with HDMI for professional tasks like editing, coding, and trading.
Frequently Asked Questions
Can I use any HDMI cable for a 4K second monitor?
Not all HDMI cables support 4K at 60Hz. Use an HDMI 2.0 or higher cable for 4K 60Hz and ensure your GPU supports the resolution and refresh rate.
Do I need an adapter to connect a monitor with HDMI?
If your computer lacks an HDMI port, use a compatible adapter like USB-C-to-HDMI or DisplayPort-to-HDMI. Choose active adapters for older hardware or complex setups.
Why is my second monitor blurry after connecting via HDMI?
Blurriness usually comes from using a non-native resolution or incorrect scaling. Set the monitor to its native resolution and adjust scaling in the OS settings.
Will HDMI carry audio to my second monitor?
Yes, HDMI can carry audio if the monitor has speakers or an audio output. Select the HDMI device in your operating system’s sound settings to route audio.
Conclusion
Setting up a second monitor with HDMI is a fast way to increase productivity and improve your workspace. Follow the steps above to prepare hardware, connect the cable, configure settings, and troubleshoot any issues. Try the tips and advanced tweaks to get a clean, ergonomic setup that fits your workflow. Now go plug in that second screen, test the settings, and enjoy the extra space — and if you found this guide useful, leave a comment or subscribe for more practical setup tips.